Hello everyone! It’s been a busy few weeks, I’m studying a lot about Machine Learning and I don’t have too much time to write or share my progress. However, I had to set up a new development environment and I thought, why not share a bit of my setup?
So here’s how to choose a shell, how to set up my favorite prompt and font, and some more personal tools I commonly use!
Choosing a Shell
The first thing I like to do is to choose a shell for my terminal. The three most common Linux shells that I have been able to test in the past are:
-
Bash (Bourne-Again SHell): This is the default shell for most Linux distributions. It is a powerful and versatile shell with a wide range of features and capabilities.
-
Zsh (Z Shell): This is a highly customizable shell that is popular among power users. It offers advanced features like tab completion and spelling correction and has an amazing community.
-
Fish (Friendly Interactive SHell): This is a user-friendly shell that is designed to be easy to use and intuitive. It has a simple syntax and offers many helpful features like syntax highlighting.
In many cases I have chosen to stay with Bash because it is the most widely used command interpreter and therefore well supported by the Linux community, but also because Bash is commonly the default command interpreter for most Linux distributions, so it is usually already installed on the system and usually suits my needs for simple projects.
However, in most cases and especially in cases where I expect to work long term or make extensive use of the interpreter, I like to choose Zsh because of the amount of options, plugins, and extensions it offers.
That’s why for this post I am going to use Zsh as an example.
How to install Zsh and set it as the default shell
Installing Zsh is quite easy but can be tricky.:
- It is usually possible to install Zsh from the package manager of your distribution using one of these commands:
- For Ubuntu, Debian & derivatives:
apt install zsh- For Arch Linux or Manjaro:
pacman -S zsh- For Fedora:
dnf install zsh- Make it your default shell:
chsh -s $(which zsh)or use sudolchsh $USERif you are on Fedora. - Log out and log back in again to use your new default shell.
- Test that it worked with
echo $SHELL. Expected result:/bin/zshor similar. - Test with
$SHELL --version. Expected result: ‘zsh 5.8’ or similar
Zsh on steroids: Zim
Zim is a Zsh configuration framework that bundles a plugin manager, useful modules, and a wide variety of themes, without compromising on speed.

Installing Zim is easy. You can choose either the automatic or manual method refered in their documentation.
For the automatic install, we can use curl or wget and parse the installation script, this will install a predefined set of modules and a theme:
- With
curl:
curl -fsSL https://raw.githubusercontent.com/zimfw/install/master/install.zsh | zsh- With
wget:
wget -nv -O - https://raw.githubusercontent.com/zimfw/install/master/install.zsh | zshRestart the terminal and we’re done. Enjoy Zsh IMproved! Take some time to tweak the ~/.zshrc file, and to also check the available
modules and themes we can add to ~/.zimrc.
Installing a Nerd Font
After setting up the shell and my favorite framework I always install my favorite Nerd Font. And what is a Nerd Font? Well, Nerd Fonts are special fonts that takes regular fonts and patch them with a high number of glyphs (icons).

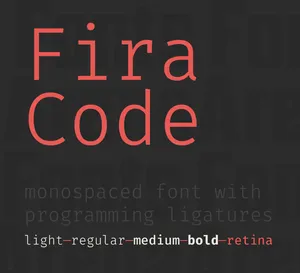
There is a wide variety of Nerd Fonts, but my favorite version is the one that patches the font called Fira Code. Fira Code is a monospaced font that includes programming ligatures, which can make your code more readable.
So, to install this font on Linux, follow these steps:
- Download the Nerd Font version of the Fira Code font from the official repository (or any other font that you like more!).
- Extract the font files to a folder on your system.
- Copy the font files to the
~/.fontsfolder. - Run the command
fc-cache -fvto manually rebuild the font cache.
Alternatively, you can use this script to install any Nerd Font you like automatically (or any amount of them if you want more than one for any reason, huh).
Now you can have a pretty and nice prompt with a lot of information!
The Starship Prompt
Another tool that I want to introduce is the Starship prompt. This is a customizable and fast shell prompt written in Rust that displays useful information in the terminal, like useful system information, Git repository or virtual environment.
It can be installed in many ways depending on the operating system and shell. In this case, I will explain the installation as a Zim module and as standalone.
Install as a Zim module
Add Starship to your .zimrc:
zmodule joke/zim-starshipThen install Starship:
zimfw installStandalone installation
To install Starship in a linux system with a bash or zsh shell:
- Open a terminal and run the following command:
sh -c "$(curl -fsSL https://starship.rs/install.sh)"- Add the following line to your shell’s configuration file (e.g.,
~/.zshrcfor zsh or~/.bashrcfor bash):
eval "$(starship init zsh)"That’s it! Easy, right?
Now you can have a pretty and nice prompt with a lot of information!
If you want more customization you can try to customize the Starship prompt by editing the ~/.config/starship.toml file. This file contains a number of settings that you can tweak to your liking, you can learn more about it here.